MDATP: talking to the User

Sometimes isolating or blocking user actions (like downloads) is too restrictive – instead you just want to warn or ‘educate’ him.
At the same time, I don’t know too many ITpros that enjoy talking to their end-users (I think we all should, but this is another story).
Today we will look into a flow-automation of Microsoft Defender Advanced Threat Protection (MDATP) alerts. Here is the scenario:
Users (with or without) admin permissions tend to download stuff from the internet. Often these tools are packaged with ‘additional functionalities’ commonly called PUA – potentially unwanted applications.
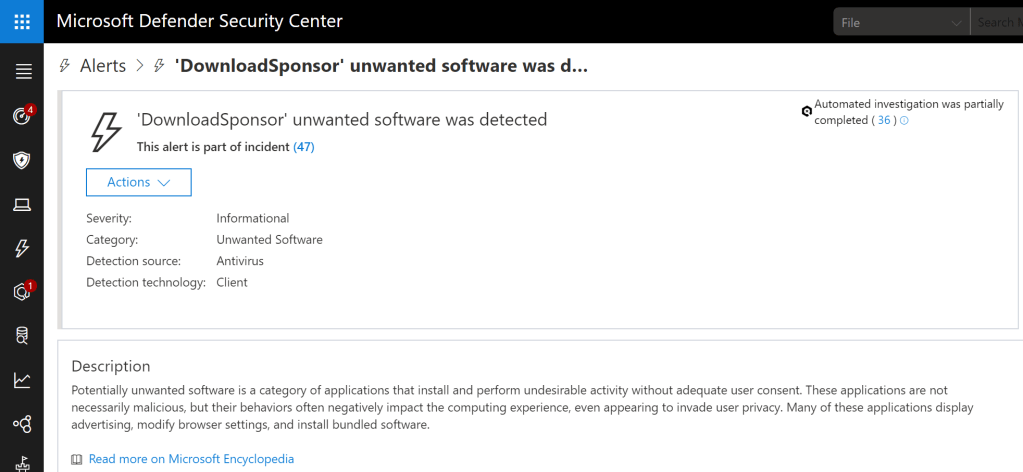
If you enable PUA detection on the client (via PowerShell or Intune), MDATP throws alerts when PUA is downloaded by the user:
The idea now is to automatically write an Email to the user that has triggered the alert whenever such an alert occurs. Let’s have a look into the flow components and configuration we need.
First of all, we need the trigger that is fired, when an alert (in general) in MDATP occurs. Then we need to “get this alert (instance)” and then we take a closer look to check if the alert category is equal to “UnwantedSoftware”. The category-check is done in a Flow Condition:
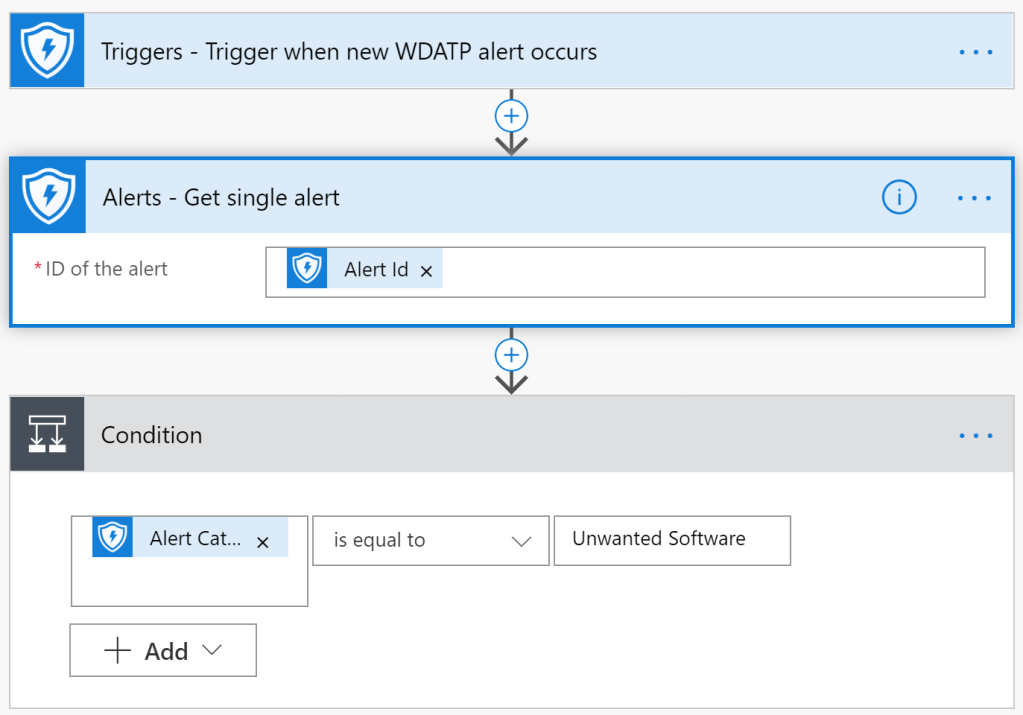
From then on we are only interested in the “Yes” case of the condition – meaning: only if the alert has a category of “Unwanted Software”, proceed, otherwise, grab a coffee.

Now its getting more tricky: If we want to send an Email to the user – guess what – we need her Email address. But …
- there is no built in way at the moment in flow to get the username out of an MDATP alert
- and there is also no way to get an username by advanced hunting query from the AlertEvent schema (in other words: the alert has no associated query-able user property).
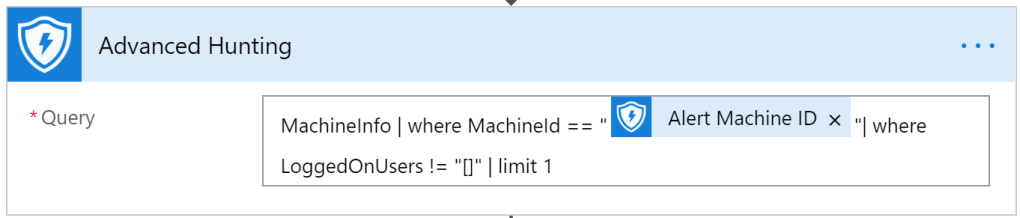
One possibility is to search in the MachineInfo namespace for LogonEvents and extract the user from that. Let’s do that.
To search for MachineInfo, we first need the Machine Context associated with our alert:

With the MachineID now, we can start a Hunting Query:
Next we use the ‘Parse JSON’ action to read the result of the Advanced Hunting Query:
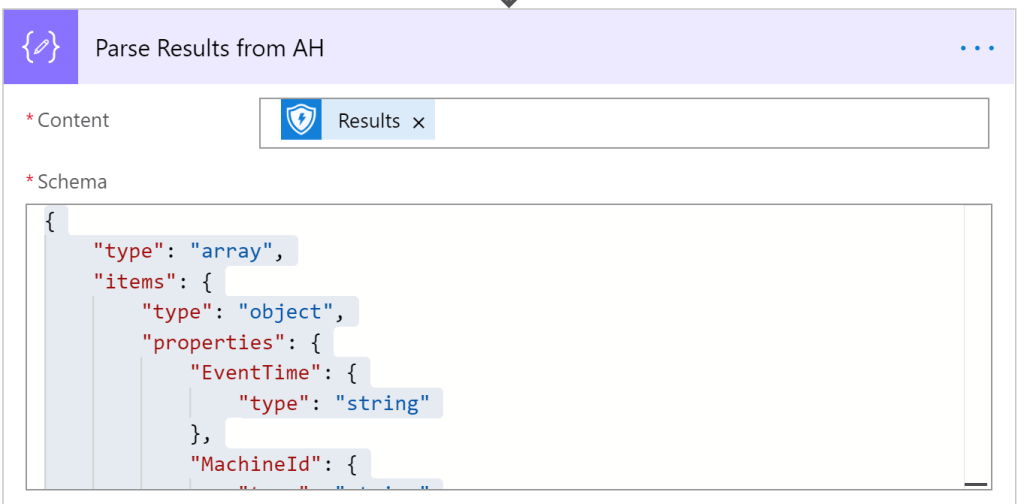
To get the necessary schema, you can run the flow and take the result of the Advanced Hunting Query and then click on “Use sample payload to generate schema”. However, here is the schema for you to copy’n’paste:
{
    "type": "array",
    "items": {
        "type": "object",
        "properties": {
            "EventTime": {
                "type": "string"
            },
            "MachineId": {
                "type": "string"
            },
            "ComputerName": {
                "type": "string"
            },
            "ClientVersion": {
                "type": "string"
            },
            "PublicIP": {
                "type": "string"
            },
            "OSArchitecture": {
                "type": "string"
            },
            "OSPlatform": {
                "type": "string"
            },
            "OSBuild": {},
            "IsAzureADJoined": {},
            "LoggedOnUsers": {
                "type": "string",
                "properties": {
                    "UserName": {
                        "type": "string"
                    },
                    "DomainName": {
                        "type": "string"
                    },
                    "Sid": {
                        "type": "string"
                    }
                }
            },
            "RegistryMachineTag": {
                "type": "string"
            },
            "ReportId": {
                "type": "integer"
            },
            "OsVersion": {
                "type": "string"
            },
            "MachineGroup": {
                "type": "string"
            }
        },
        "required": [
            "EventTime",
            "MachineId",
            "ComputerName",
            "ClientVersion",
            "PublicIP",
            "OSArchitecture",
            "OSPlatform",
            "OSBuild",
            "IsAzureADJoined",
            "LoggedOnUsers",
            "RegistryMachineTag",
            "ReportId",
            "OsVersion",
            "MachineGroup"
        ]
    }
}
When you take a look at the JSON above, you’ll recognize that it has some nested items. Of course, the item we are looking for is WITHIN the nested part (‘UserName’).
So we take the output (JSON) of the last action and send it to a new ‘parse JSON’ action:

Again, here is the needed schema:
{
    "type": "array",
    "properties": {
        "UserName": {
            "type": "string"
        },
        "DomainName": {
            "type": "string"
        },
        "Sid": {
            "type": "string"
        }
    }
}
With the ‘JSON Compose’ action, we can now select “LoggedOnUsers”:

For further processing we need to convert the output to a JSON again:

The format of UserName we get back, sadly is not in UPN format. So, again, we need some tweaking here:

As you can see in the tool tip, we take the result from before and select the property UserName (from the first entry of the array), then we add (hardcoded) the UPN suffix.
With that finally, we can do a search in AAD for the Email address (if this is the same as the UPN in your case, you can skip this):

Here we go. Now that we have the user object (and Email address) of the user, lets write her an Email:
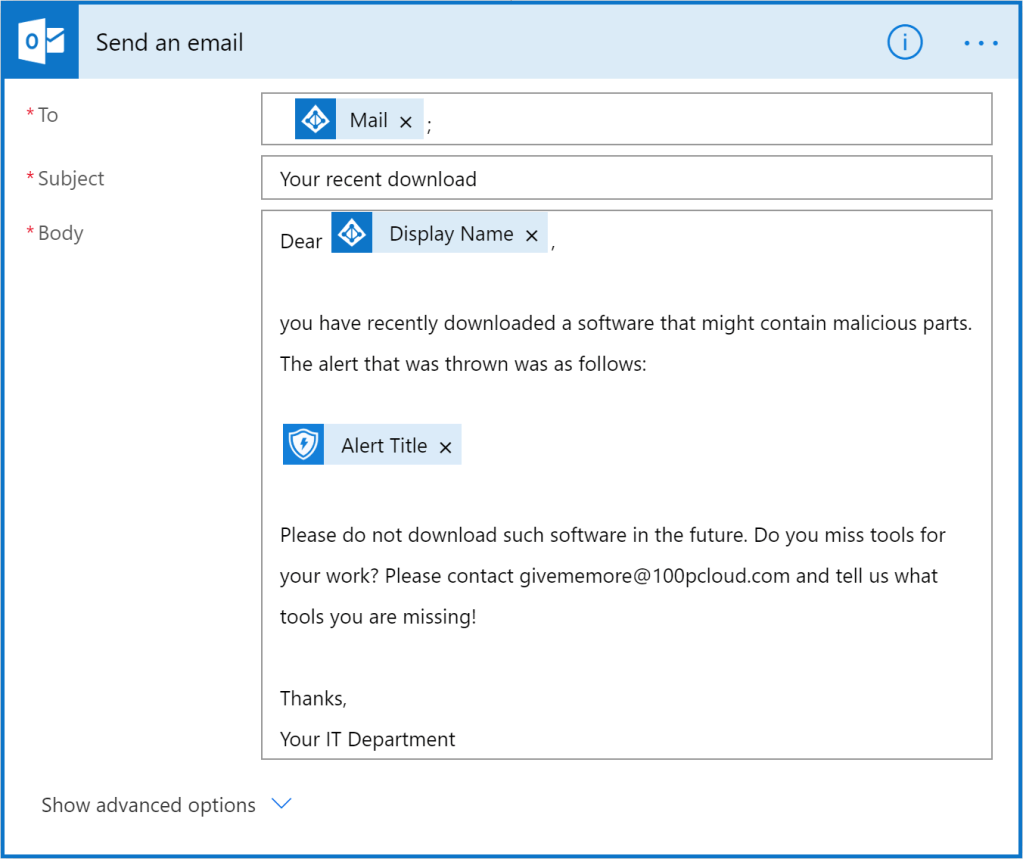
You can use dynamic fields to enhance the information in the Email.
WARNING: So, you like the idea described in this post and want to deploy this flow to your 20.000 users after lunch? Wait.
This is just a prove of concept, I did no testing in an environment outside of my test lab. I would carefully test this, before rolling it out to real users. Also, in multi-user device environments, you might don’t reach the user you wanted to reach with the method described here.
Also, this is meant for inspiration. There are other use-cases where you would want to communicate with your end-users automatically, like e.g. Threat & Vulnerability Management (Warning about threats in self-installed software).
Conclusion
The need to automate user communication based on MDATP alerts exists. The available possibilities with flow are quite complex at the moment. Things would be much easier, if MDATP would return the UserName associated with an alert by advanced hunting (and in UPN format ;-)). Another option would be to add a “send email” option in the ‘custom detection’ actions.
As always in the cloud: this is coming soon to a tenant near you.
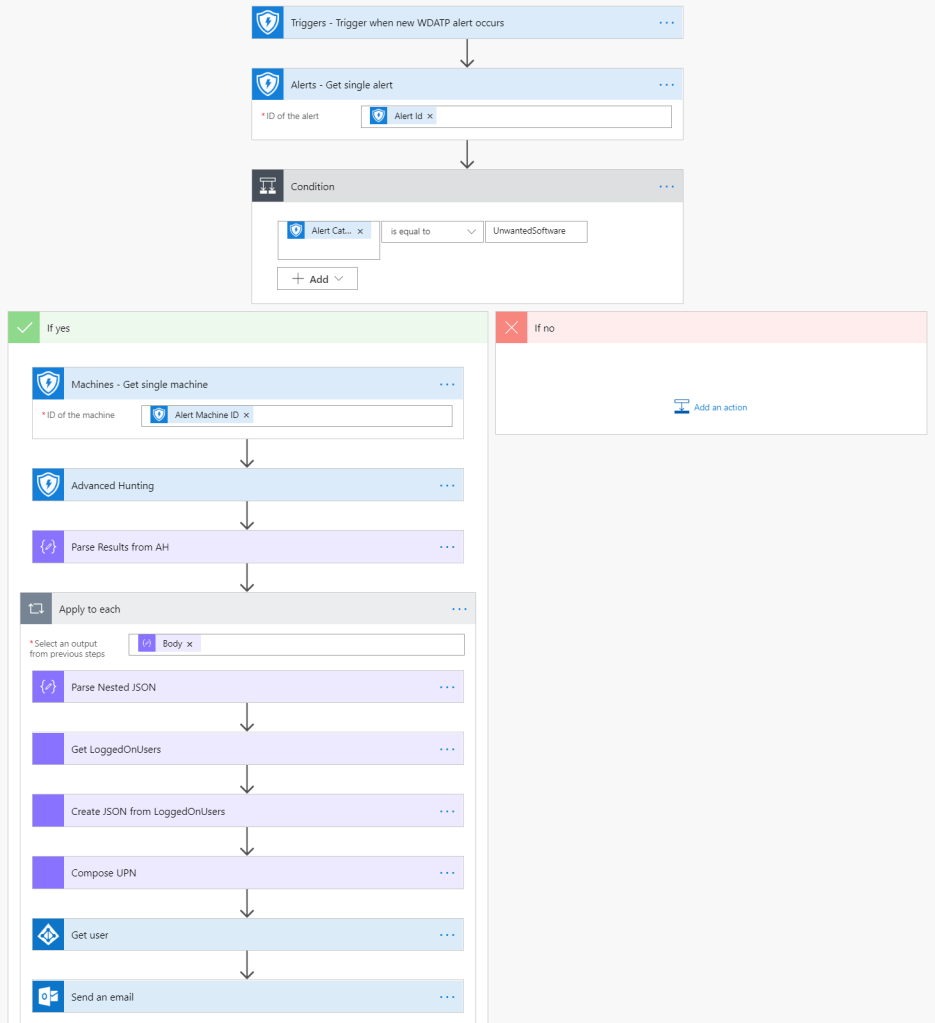
Here is the complete flow tree. Thanks for reading!

Awesome. Im trying to look into the same when Cloud App Security gives an alert on “unfamiliar location”, where it sends an email to the user and they can verify with Yes/No button if they actually are in this location now, and if yes, resolve the alert, if no block the account and send msg to Teams SOC Channel. Not quite there yet..:(
LikeLike
Actually I once thought about that too, but the problem is: the attacker from the unfamiliar location would also press this button. Maybe it would be good to switch channels here (SMS) or so. At least nothing from the O365/AAD credential context.
LikeLike
Thats true, didnt think of that, in 90% of the cases its actual users, so maybe use this PUA example in the same way to just inform the user that an alert was triggered, so that it can talk to the user with flow instead. might save some time if the user reports back on it..
LikeLike
good idea – cool!
LikeLike