Gundog 2

During the last year many ideas came to my mind on how to improve the current gundog experience. Over the last months I finally found the time to bring those ideas to PowerShell and here we are with version 2 of gundog.
The first news is you can now install it from the PowerShell Gallery: install-module gundog
Then, it now is capable of supporting multiple tenants – so you can hunt with the same query over multiple tenants, which is quite cool. For being able to do so, you need to do all the configurations necessary in the gundog.config file. By choosing 8 from the gundog menu, we fire up notepad with the config json file. Modify and save it to be prepared for the first run.
Gundog is made to work with api permissions, so you need a (multi) tenant app with the appropriate permissions, and you need to configure a clientId and secret for it. Gundog expects that you save the secret in a keyvault. The connection to the keyvault is also configured in the config file.
Config
The config file (gundog.config) consists of three parts
- allTenants – holds the names of the tenants and the tenantIds (the name is just a display name for gundog)
- globalVars – you can configure a lot of stuff here to adjust gundog to your needs
- connectionData – this is the configuration of the keyvault that holds the secret
For more information about the config and about the permissions you need to configure (tenant registered app) to give gundog the appropriate access, take a look at the blogpost about version one of gundog.
Start-Gundog
After you have installed gundog and configured your tenant(s) and keyvault data, you can import the module (import-module gundog) and start it: Start-Gundog (after each operation, to get back to the main menu, you always have to re-run Start-Gundog).

Now let’s delve into the new features:
1 All alerts by Tenant
As most of the other functions ‘All alerts by Tenant’ will bring you to the tenant menu:

This lists all the tenants from your config file (actually the first 3 letters of the tenant’s name). Next you are prompted on for how long you want to look back to display all the alerts of this tenant:
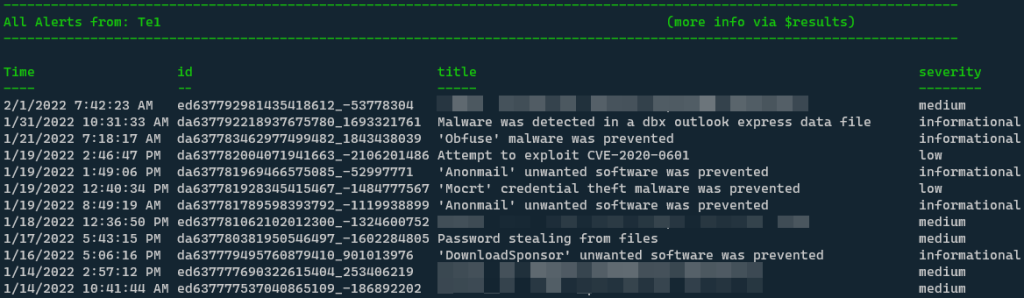
In most cases you can use the global variable $results after each run to get a custom PS Object of your search results and you can use this in any way you want with all the PowerShell possibilities:

From the initial table above, you can take the alertId you are interested in and send it to gundog hunting:
2 Gundog Hunting by AlertId
This option will provide you with lots of information about the specified alert and even some additional information about the entities associated with it. This was the main functionality of gundog v1. To learn more about the features of this function, check out the blogpost about v1.
Just to give you an impression of what data you would expect here:
- per default, only the most relevant data is displayed (this is the way)
- it gives you context wherever possible: last AAD Sign-Ins & user’s AAD address
- network connections can be automatically filtered to display more relevant connections only (get rid of connections to Office 365 e.g.)
- network connections are enriched with geo location (country & city)
- in the variables section of gundog.config you can easily adjust most parameters like advanced hunting timeframe of every query
3 Vulnerabilities
Again, with option 3, you are asked for the tenant you would like to hunt in. However, now we introduce multi-tenant hunting. You can specify either one, multiple (comma-separated) or all (*) tenants.
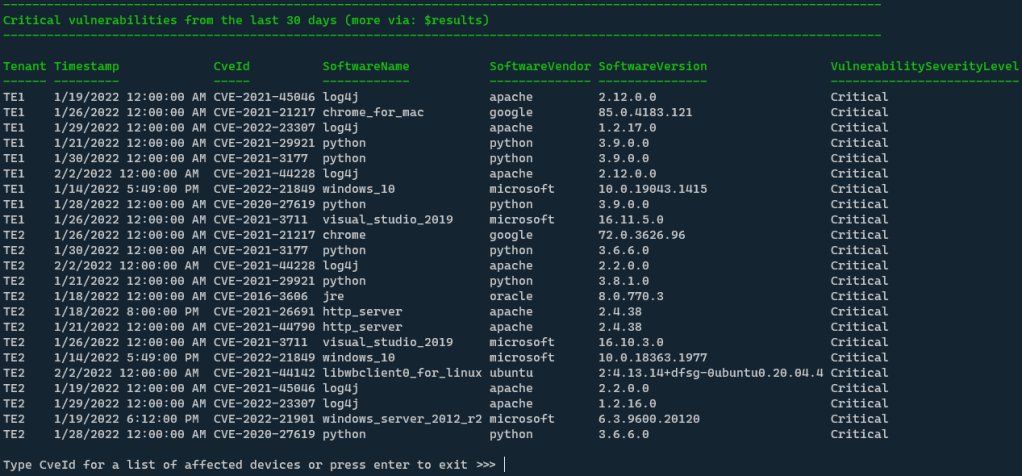
This will display all the critical vulnerabilities of the specified tenants (See tenant column on the left). You are then asked to specify a CveId to receive a list of all associated devices.

Again, you always have the $results variable to further work with this data or to simply export it to a *drum roll* CSV.
4 All Alerts (med/high) last 24 h
As the name implies – with this option, you are displaying all medium and high severity alerts from all configured tenants form the last 24 hours.
5 All Alerts (med/high) last 24 h (Refresh)
Yes, same as 4 but we are looping through the tenants every hour. In addition, high severity alerts are highlighted in red and those that are new since the last run are highlighted in orange.

6 Plain KQL Hunting
Multi-tenant hunting (one, multiple or all) for KQL you input into the terminal – either by copy and paste OR by just copying. If you don’t specify a query in the terminal, gundog will read from your clipboard:

Let’s for example say, you would like to know which processes are talking to a certain IP address in some of your configured tenants. You would use a KQL query like this:
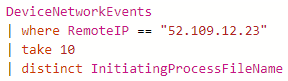
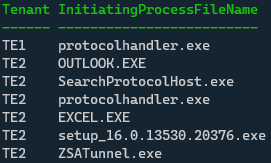
If you copy this into your clipboard or paste it directly into the terminal, gundog will come up with a PS object like this:
7 Hunt from GitHub Repo

You can again specify multiple tenants here and then specify the URL of a GitHub repo, that holds KQL queries. Next, gundog will parse this repo and display you all the KQL files it found there:
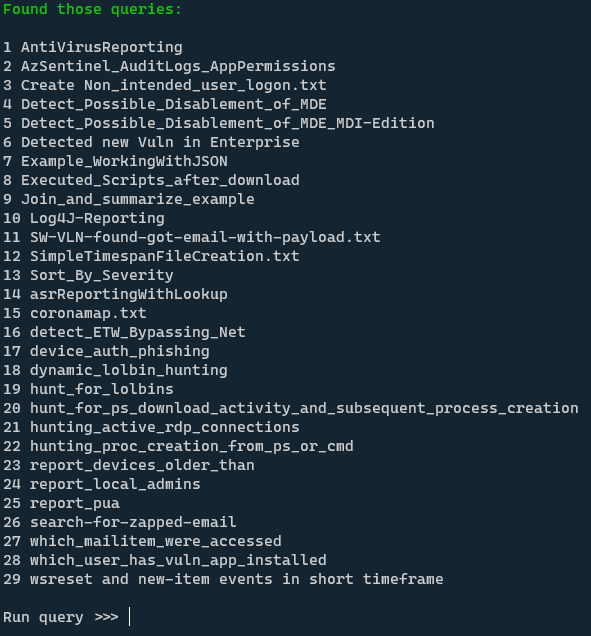
You type the number of the query; you would like to run and then this is executed against the tenants you have specified before.
I am also exporting the functions from the gundog menu in the module. So, you can also directly run them if desired:
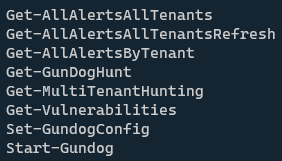
If you want to take a look at the source upfront, check out the gundog2 repo on GitHub.
Here you can see gundog 2 in action:
That’s it for the moment. More to come – hope you like gundog! If you have ideas for more features – let me know!

Pingback: Week 07 – 2022 – This Week In 4n6